Workbench for Zephyr
Workbench for Zephyr is a Visual Studio Code (VS Code) extension that adds Zephyr development support, including SDK management, project creation wizard, build/flash, and debugging.
Check the Getting started tutorial for a walkthrough.
Key features
Install native Host Tools (Python, CMake, …)
Install and assign toolchains (Zephyr SDK, IAR, …)
Import West workspaces
Create and import Zephyr applications
Build and flash applications
Debug applications
Install runners automatically
Perform memory and static analysis
Compatibility
Windows 10-11
Linux (x86_64)
Ubuntu
Debian
Fedora
Other distributions may also work (not tested)
macOS
Getting started
Install the extension
Install Workbench for Zephyr from the VS Code Marketplace.
Open the Workbench for Zephyr extension
In the Activity Bar, click the Workbench for Zephyr icon.
Install Host Tools
Click Install Host Tools to download and install the native tools (typically into
${HOME}/.zinstaller).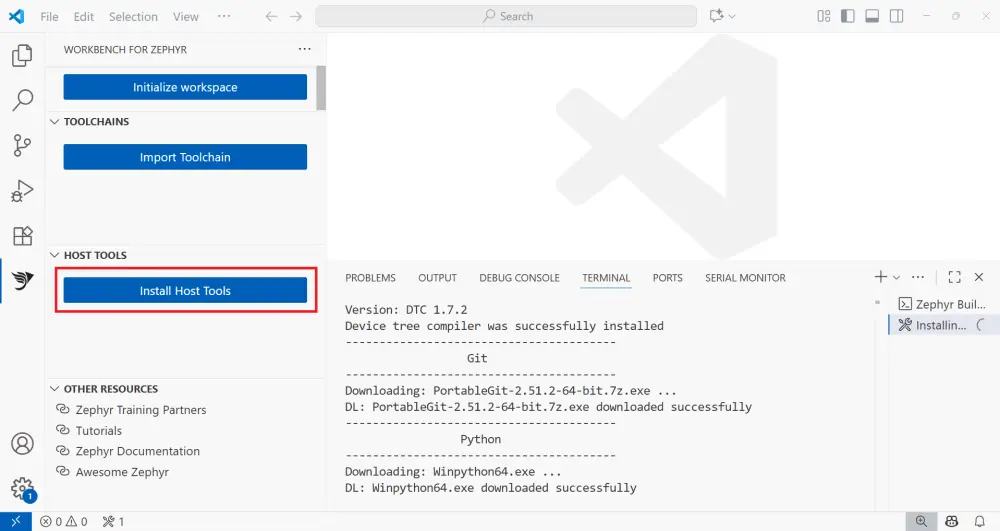
Note
Some host tools may require administrator privileges. On Windows, this is required when installing 7z. On Linux, this is required when installing tools using the package manager, for example when running apt install.
Import a toolchain
Click Import Toolchain, choose a toolchain, and select the destination folder.
A toolchain provides the compiler and debugger required to build and debug Zephyr applications. The Zephyr SDK is the recommended option and can be installed as either the full package or a minimal target-specific version. Workbench also supports other toolchains, such as IAR.
Initialize / Import a West workspace
Click Initialize workspace and fill the workspace information.
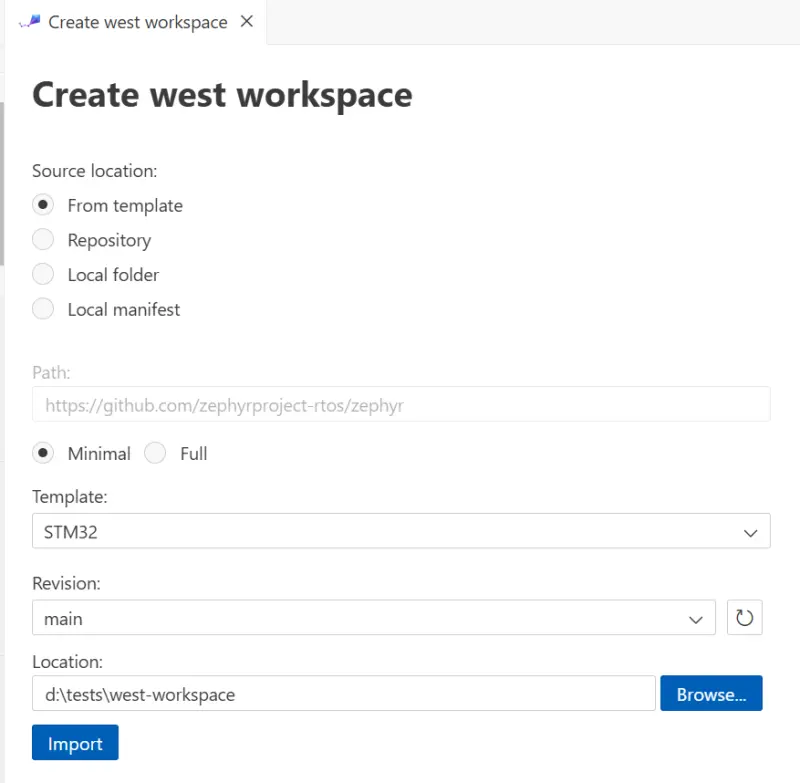
Workbench will create the workspace and parse the west manifest to configure projects.
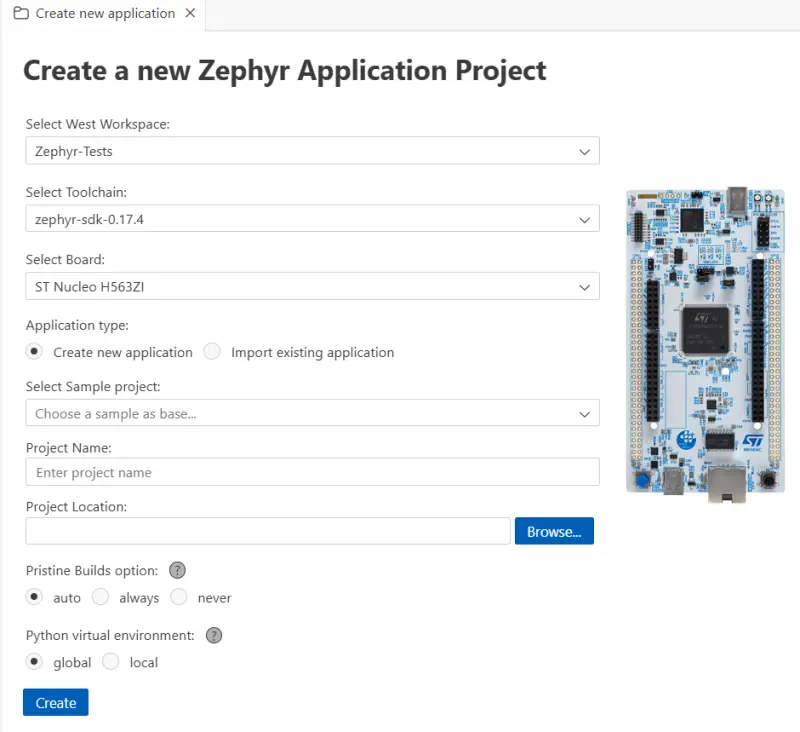
Create a new application
On Workbench for Zephyr, new projects are based on samples from Zephyr sources.
Click Create New Application.
Select the West Workspace to attach to.
Select the Zephyr SDK to use.
Select the target Board (for example,
ST STM32F4 Discovery).Select the Sample project to base on (for example,
hello_world).Enter the project name.
Enter the project location.
Build the application
Click Build in the status bar, or select the application folder to build. Build output is shown in the integrated terminal.
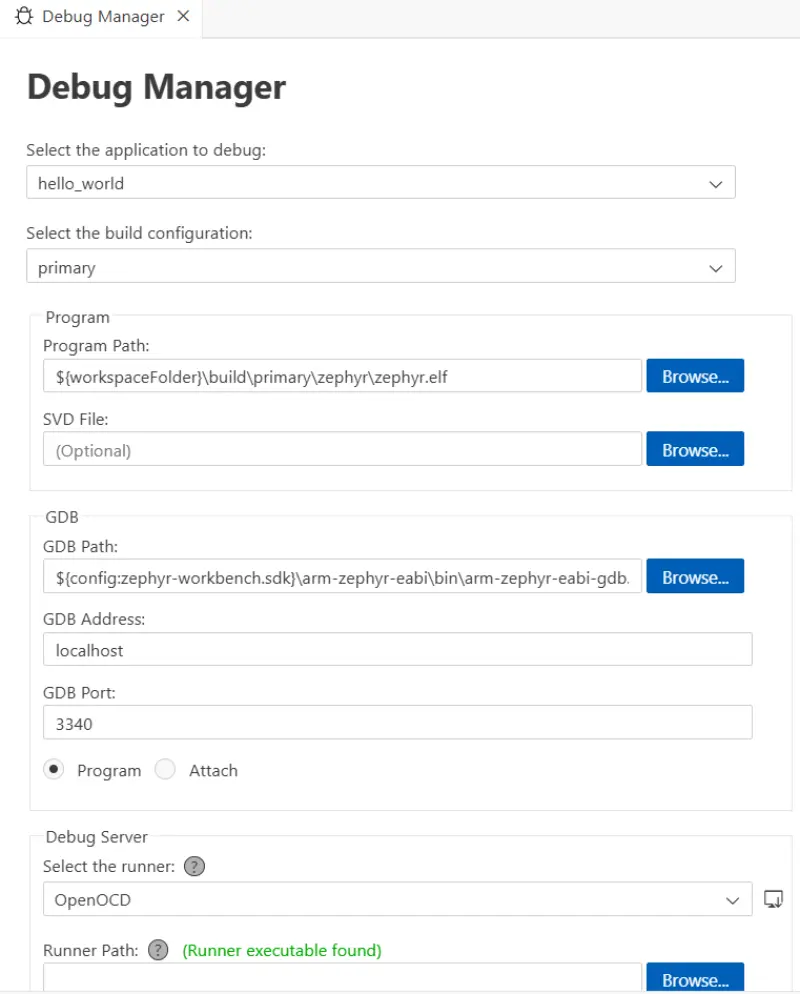
Configure and run a debug session
Use Debug Manager to generate/update a debug configuration (
.vscode/launch.json):Generated ELF (Program Path)
SVD file (optional)
GDB/port/address (if needed)
Debug server/runner (OpenOCD, J-Link, LinkServer, pyOCD, …)
Then start debugging normally via Run and Debug
Install Runners
Workbench for Zephyr can provide installers for some runners (for example, OpenOCD and STM32CubeProgrammer). Use Install Runners to view supported tools and install them (or open the vendor website).
Useful links
You can explore the Extension repository
For more details, check out the Full documentation